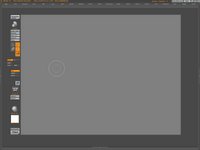
Over the next few weeks I am going to try and do a step by step walkthrough on creating a character for a game. It's going to be pretty quick and dirty but will hopefully show a few tips I've picked up recently. Most of the stuff in the walkthrough will be techniques posted around the CG community websites, but with this one they will focus on a realtime character.
So to kick off I've posted up my custom ZBrush user interface for you to try out. It only has the tools and functions I most often use for realtime character creation, which should be a fair bit more streamlined than the usual clutter you have to sift through. To use this you will also need the ZMapper plugin and I the hotkey editor too. You can find both of these over at www.zbrushcental.com. The .CFG file gets copied to C:\Program Files\Pixologic\ZBrush2. Backup your own Custom UI first if you have one.
The only other major tool I use not on the side panel of the UI is smart resym, but only because I haven't figured out how to get it over there. Instead I access this normally by going through the Tool>Deformation menu. If you know a way of doing this feel free to let me know in the comments. You can always switch back the normal layout by hitting the Standard button at the top right if my UI is missing something you use.
Next up will be the low poly Head in max.
Click Here to download the Zbrush UI
No comments:
Post a Comment