Showing posts with label zbrush. Show all posts

Sunday, April 04, 2010

Astrofunk Issue 2

Haven't posted in ages so here's something I did a while back for Ross Burts' latest issue of Astrofunk!

The image was mostly created/rendered in zbrush using passes. I did a separate render for the fur in max (which too waaay too long) as well as using Mental Ray for the background bots.
And here is the render as it appears in the comic!


You can buy a copy of Astrofunk right now! The previous issue is available too...

Wednesday, April 30, 2008

Speed Sculpt


Another super quick zbrush sketch, think this angry guy took aboout 90mins all in, built from a sphere, using mainly clay tubes and extracts. Shoved some teeth in to finsh him off.

Troll Slayer


Some more speed sculpting in zbrush :D

Additonal view

Tuesday, December 18, 2007

Roll

I've been fighting with zbrush for a while now trying to get the mysterious roller brush to work. The idea is that you can roll on alpha brushes like you would use a roller brush with paint on your walls at home. This is perfect for doing fabrics, skin pores and all kinds of cool stuff. Thing is i couldn't bloody do it. As it turns out it wasn't the roller brush i was after at all, but a little button in the stroke menu "roll" which modifies your current stroke (dots and freehand work). So bloody obvious! Works outside of projection master too.


Wednesday, November 21, 2007

Character Sheet

Quick zbrush tip to quickly create orthographic and perspective renders. Align the camera to front view (use shift+left click drag). Click Document>Zapplink Properties, then click the front button. Do the same for the right view. Then approximate a 3/4 view and click custom. Then simply hit "Make Character Sheet" and zbrush will punt out multiple views of your character to photoshop. It uses 2 separate layers too, so you can composite your character into a different background. You should get an image like the one below.


Wednesday, March 07, 2007

Realign Symmetry tip


To speed up my workflow in zbrush I usually use Realign Symmetry function after working on one half of the mesh. This allows me to hide lots of unnecessary polys speeding up viewport performance. There are however a few tricks to make sure you end up with a clean mesh in the end. As the image above shows instead of simply applying your realign symmetry to the final subdivision (level 6 in my case here) apply it on every sub divisional level starting with the lowest. This can take a while but the results are worth it, you should end up with a seam free mirror of your sculpt. If you don't do this chances are you will get an ugly seam which will be a total pain to get rid of.

Wednesday, September 06, 2006

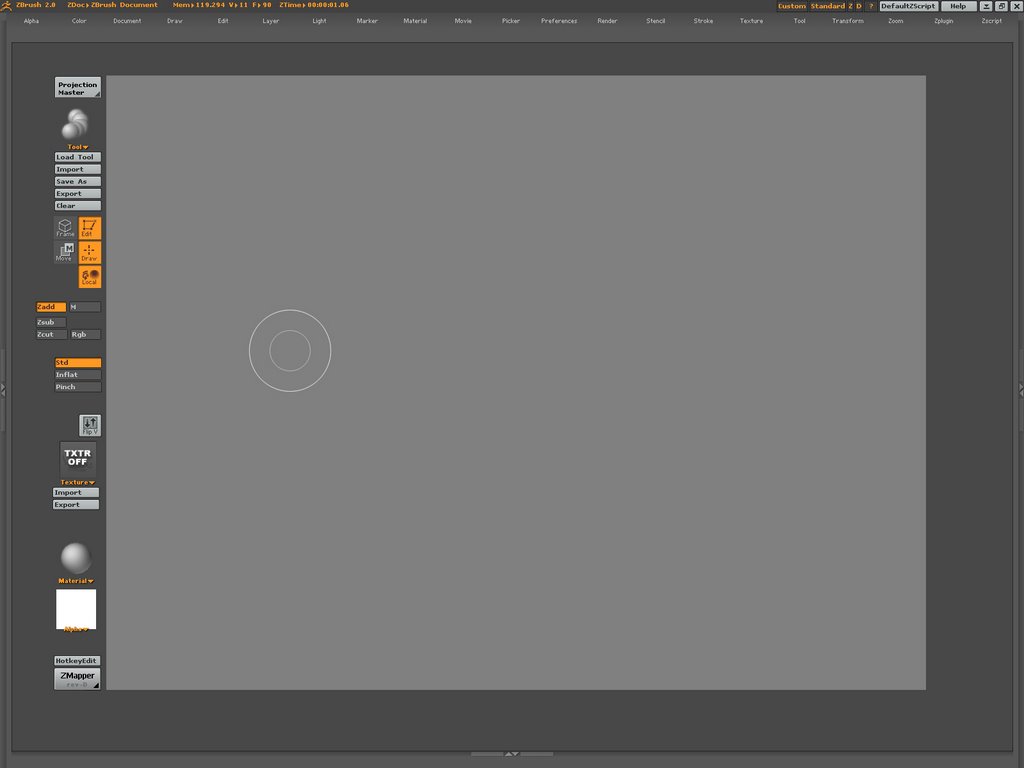
Zbrush UI


Over the next few weeks I am going to try and do a step by step walkthrough on creating a character for a game. It's going to be pretty quick and dirty but will hopefully show a few tips I've picked up recently. Most of the stuff in the walkthrough will be techniques posted around the CG community websites, but with this one they will focus on a realtime character.

So to kick off I've posted up my custom ZBrush user interface for you to try out. It only has the tools and functions I most often use for realtime character creation, which should be a fair bit more streamlined than the usual clutter you have to sift through. To use this you will also need the ZMapper plugin and I the hotkey editor too. You can find both of these over at www.zbrushcental.com. The .CFG file gets copied to C:\Program Files\Pixologic\ZBrush2. Backup your own Custom UI first if you have one.


The only other major tool I use not on the side panel of the UI is smart resym, but only because I haven't figured out how to get it over there. Instead I access this normally by going through the Tool>Deformation menu. If you know a way of doing this feel free to let me know in the comments. You can always switch back the normal layout by hitting the Standard button at the top right if my UI is missing something you use.

Next up will be the low poly Head in max.

Click Here to download the Zbrush UI